November 27, 2012

Kenwood Major cover tutorial

Welcome fellow hustlers (and old followers)! How are you coming along with your to-do lists? I know I'm behind... And as of today we are 2/3 of the way there. Yikes!

Kelsey Sews

One of the items on my list is a cover for a Kenwood Major stand mixer for my sister-in-law. I have one of these too. If we had pretty KitchenAid mixers we probably wouldn't want to cover them up. But these are more utilitarian and less pretty.

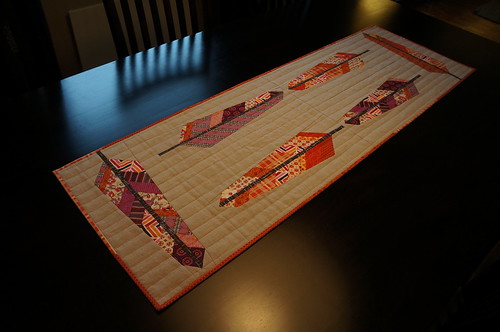
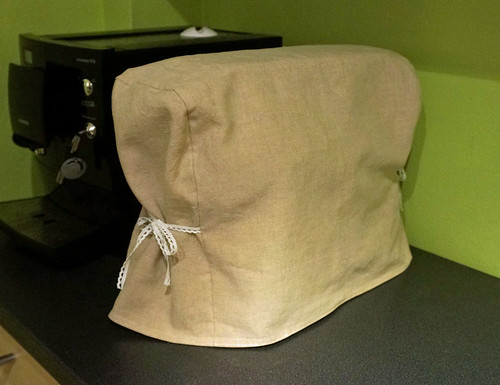
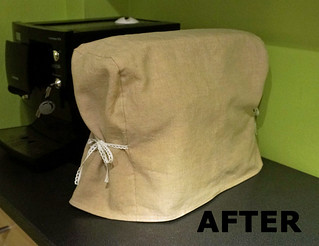
Now, my sister-in-law was quite specific about how she wanted it and it wasn't quilty! What?!? Not everyone wants their house quiltified? Nope! She wanted it plain and linen. Well, I guess I can oblige...

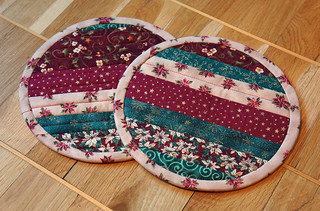
So here's what I came up with and below I'll share with you how I made it.
Mixer-cover-complete


Materials
Main fabric, lining fabric and interlining (or fusible fleece) - 2 end pieces 10.5" x 14.25" and 1 body piece 17" x 37" of each.
Ribbon - 4 pieces approximately 15" each

All seam allowances are 1/4" unless otherwise noted.
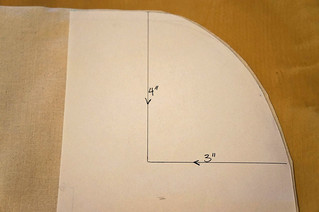
  1. Make template for curving top corners of end pieces. I started curving about 4" down from the top and ended the curve about 3" in from the side. Cut both top corners off all end pieces.
  2. Mixer-cover-step1

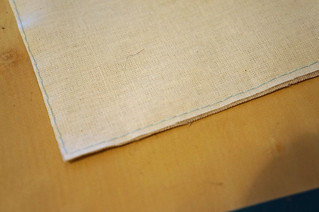
  3. Baste the interlining fabric (or fuse the fleece) to the back side of the main fabric 1/8" from the edge. The linen I was working with was difficult, so I cut the interlining to size and basted it to the linen before cutting it.
  4. Mixer-cover-step2

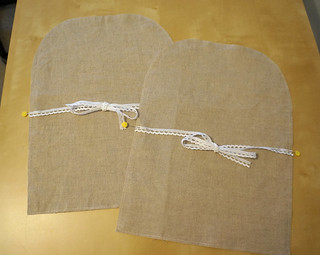
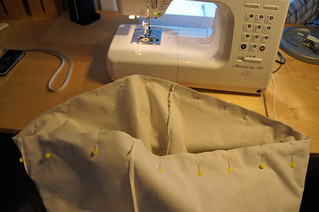
  5. Attach the ribbon pieces about 6.5" up from bottom of end pieces and secure ends so they stay away from the seams.
  6. Mixer-cover-step3

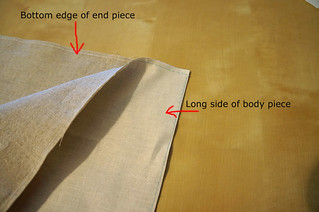
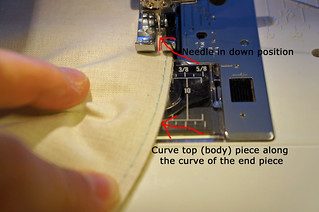
  7. With right sides together line up the end of one long side of the body piece with one side of an end piece. Backstitch at beginning. Backstitch over ribbon ends when you get to them. When you get to the curved part make sure your needle stops in the down position and carefully curve the straight edge of the body piece along the end piece, stopping to readjust the fabric as needed.
  8. Mixer-cover-step4

    Mixer-cover-step4-2

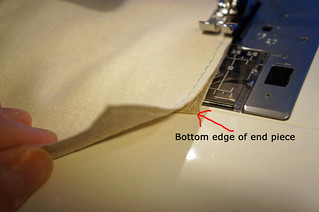
  9. At the end the body piece should be too long. Don't worry about this. Backstitch to secure end of seam.
  10. Mixer-cover-step5

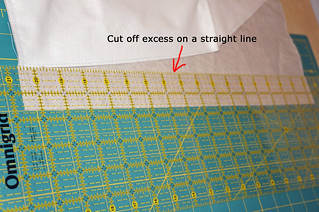
  11. Cut off excess fabric from the body piece. Press seams toward body piece.
  12. Mixer-cover-step6

  13. Repeat step 4 with other end piece of the main fabric. The body piece should be the right length now.
  14. Repeat step 4-7 with the lining fabric pieces. Press seams toward end pieces.
  15. With right sides together pin main and lining pieces together along the bottom edge. Sew around the edge leaving a 4-5" opening for turning. (Optional: assemble with wrong sides facing and close up by binding the bottom edge.)
  16. Mixer-cover-step8-1

    Mixer-cover-step8-2

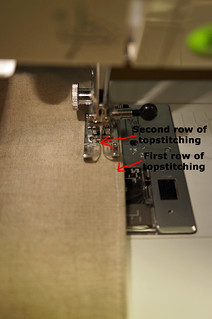
  17. Turn right side out, press and topstitch along bottom edge (this will also close the opening used for turning) 1/8" and 3/8" from bottom edge.
  18. Mixer-cover-step9-1

    Mixer-cover-step9-2

  19. Press and put to use!
Mixer-cover-BEFORE

Mixer-cover-AFTER


There, one Christmas gift crossed of the list. So many more to go...

Thanks for stopping by!

Marit


November 26, 2012

Feathers finished!

Feather-table-runner-ontable


While many I know in the US already have their Christmas decorations up, we here in Norway are a bit more laid back and won't decorate for several more weeks. Traditionally we decorate on the 23rd (yes, of December), but the American in me will probably start in about two weeks:)
Mens mange jeg kjenner i USA allerede har pyntet til jul, er jo vi her i Norge litt mer avslappet og venter en stund med det! Men amerikaneren i meg vil nok begynne så smått om et par uker:)

Until then I will enjoy my newly completed Feathers table runner.
Frem til da kan jeg nyte min nylig fullførte fjærløper.
Feather-table-runner-full

Pattern by Anna Maria Horner. Linen blend background fabric from Scandinavian store Stoff og Stil. Feather fabric mainly Chicopee with some Flee Market Fancy and Madrona Road mixed in.
Mønster av Anna Maria Horner. Linstoff fra Stoff og Stil som bakgrunn, og stoff fra Chicopee, Flee Market Fancy og Madrona Road i fjærene.

"Organic" straight line quilting and scrappy border (again).
Quiltet med (ganske) rette linjer og nok en gang litt ymse i lukkekanten.

Feather-table-runner-detail


I think this will come back out after New Years because the colors remind me of crocus which is the first spring flower to bloom in our garden.
Tror denne vil komme frem igjen etter nyttår, for fargene minner meg litt om hagens første blomst - krokusen.

Linking up today with:
Plum and June


November 25, 2012

The (would-be) one hour baby gift

Our little girl's favorite blanket is a simple square piece of flannel backed with some super soft minky. I love minky - it is so soft and the weight of it gives the blanket a nice drape.
Lillejentas favoritteppe er en enkel firkant med flanell på ene siden og minky på andre siden. Jeg elsker minky - det er så mykt og vekten av det gjør at teppet legger seg fint rundt babyen.

I will soon be an aunt and decided this baby (due in 2.5 weeks) needed a flannel/minky blanket of its own.
Snart skal jeg bli tante, så jeg fant ut at denne babyen også trengte et slikt pledd.

Minky-blanket
(sorry for the lousy photo - poor weather + far north = crap lighting)

If you don't run out of thread in your bobbin or have to get out your seam ripper, it should come together in less than an hour...
Hvis du har nok tråd i underspolen og ikke trenger sprettekniven, skal dette kunne syes på under en time...

All it is, is a 40" square of flannel, pieced face to face with minky (leaving an opening for turning), turned right sides out and topstiched around the edge. Easy! Not the most fancy of baby gifts, but it doesn't get softer and more snuggly than this!
Det er bare en 40" kvadrat med flanell, sydd rette mot rette sammen med minky (la det være igjen åpning for å vrenge), så vrengt til rette sider ut og til slutt sydd langt kanten rundt. Enkelt! Ikke den mest fancy gaven, men det blir ikke mykere og mer kosete enn dette!

November 16, 2012

Happy Mail (outgoing)

I've been sponsoring the Norwegian postal system big time this week, sending out several packages to the US. Hopefully they will make the recipients happy upon arrival!
Denne uken har jeg virkelig sponset Posten ved å sende flere pakker til USA. Håper mottakerne blir glade når de kommer frem!

1) 3 blocks for Jennifer of Knotted Thread for her Hurrican Sandy Help quilts. A drop in her bucket of blocks rolling in, but nice to contribute. She may still be looking for donations of backing, batting and binding - her flickr group is here. With so many blocks being donated I decided to donate backing and batting for a quilt as well as making these 3 blocks.
3 lapper til Jennifer hos Knotted Thread som skal sy tepper til familier rammet av orkanen Sandy på østkysten av USA.
Sandy-Relief-Blocks


2) Not-so-Zakka-Style Potholders - these are a thank you gift for my grandparents who hosted a large party for our daughter's baptism in May. Pattern is from the Zakka Style book, but these definately have a different style:)
Grytekluter som takkegave til besteforeldrene mine som var vertskap for vår datter sin dåpsfest i mai.
Not-so-zakka-style-potholders

Not-so-zakka-style-potholders-2

3) Finally got this baby quilt and little pouch sent off to my best friend from high school who just had a baby. The pouch is for my friend (she had a hindu wedding with elephants and pink being a part of the theme/decor, so I had to give her this little pouch!).
Babyteppe og liten glidelåspung til ei god venninne som nettopp fikk en baby.

Windy_Days_Quilt_On_Bed

Elephant Zip Pouch front


And I just received notice that I will be getting some happy mail myself soon, because I WON a layer cake of Odds and Ends over at Lily's Quilts. Weee! Happy Friday to me:)
Og jeg fikk akkurat vite at jeg får litt gladpost selv snart fordi JEG VANT en "layer cake" (42 ruter á 10"x10") av Odds and Ends stoff fra Lily's Quilts. Tjo ho! God fredag til meg:)

And Happy Friday to you too!
Og god fredag til deg og!