October 16, 2012

Look Mom, I've been knitting!

A couple years ago my mom got tired of me asking her to knit things for me, so she got me a how-to book and some yarn and needles for my birthday. That's more than a hint!
For et par år siden ble mor lei av at jeg ba henne strikke ting til meg og gav meg en strikkebok, garn og strikkepinner i bursdagsgave. Det var mer enn et hint!

Now I enjoy knitting although I am only a novice and would like to get better. Like Nat who knits very beautiful things.
Nå liker jeg å strikke, selv om jeg fortsatt er en saktestrikkende nybegynner, men jeg vil gjerne bli bedre.

On my autumn to-do list was a chunky cowl for myself and when I found the Bandana Cowl pattern at Purl Bee, I decided it would be perfect for me. I had to learn one new technique (short rows) but otherwise it was very straight forward.
Jeg hadde lyst til å strikke en "hals" og da jeg fant "Bandana Cowl" mønsteret syns jeg det passet bra. Jeg måtte lære en ny teknikk (forkortede pinner), men ellers var det grei kjøring.
Bandana-cowl-flat

Yarn: Madelinetosh Tosh Chunky in Night Bloom - this yarn is super soft and has a beautiful sheen
Needles: US 9 (5,5mm) 16" circular (I bought lovely bamboo needles to go with my fancy yarn)
Garnet er Madelinetosh Tosh Chunky og er et deilig ullgarn med fantastisk fin glans.
Jeg strikket med rundpinne (40 cm) nr 5,5 - jeg kjøpte bambuspinner til å strikke med dette flotte garnet.

Here is myself looking all stylish (ha ha) with my new cowl. I love how it covers the opening of a v-neck sweater and how well it covers my neck. Perfect for the cold Norwegian winter!
Her modellerer jeg halsen. Jeg liker at den dekker åpningen på en v-halsgenser og hvor godt den dekker halsen min. Perfekt for en kald norsk vinter!
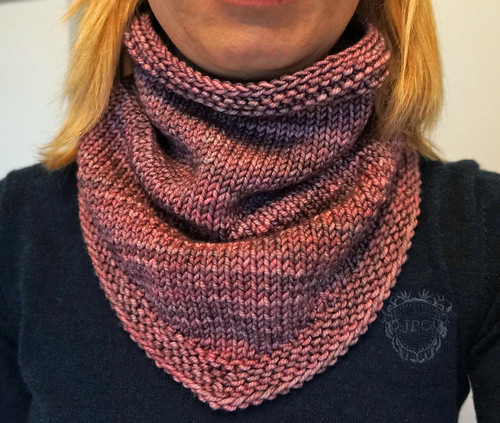
Bandana-cowl-onbody

I might be making some more of these. I think they will make for good gifts...
Kan hende jeg lager flere slike. Jeg tror de vil være fine gaver...

October 11, 2012

Let's Get Acquainted! (my day on the blog hop)

Hi and welcome to my day on the Let's Get Acquainted! Blog Hop, hosted by the wonderful Beth at Plum and June.
Plum and June

My name is Marit (pronounced Mah-ritt) and I am a Norwegian-American living just outside Oslo, Norway with one husband (yes, only one)), one baby girl and one cat. I looooove all stitchy activities - sewing, quilting, crocheting, knitting, embroidery, you name it! I also love baking, chocolate, a good glass of red wine and travelling. I wish I loved exercising and vegetables as much as sewing and sweets...
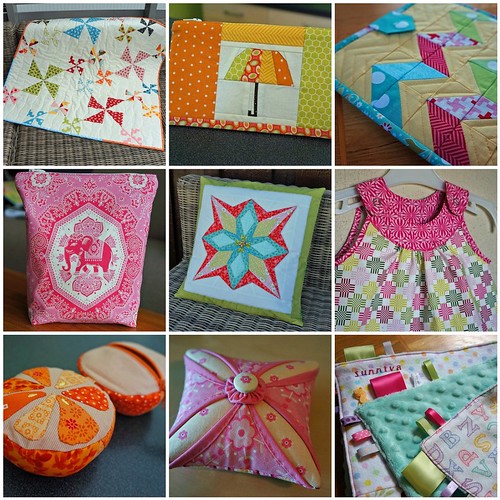
I've been blogging 4 months now. Let's start off with showing you my completed projects - as you can see, I love color!
Completed Projects 10/10/2012


Now - let get down and dirty with some details about me (me, me, me)!

How long have you been quilting: I made my first actual quilt when I was 13 (it's kind of ugly, so I won't show it to you) and since then I've been quilting on and off the last 18 years. If you don't want to do the math, that makes me 31 years old.

Favorite blogging tip: Be social and make friends. Comment on other blogs and reply to all comments on your blog (as much as possible). Flickr is a great place to meet like minded crafters by joining different groups and swaps (and bees, but I haven't tried that yet).

Favorite chocolate: Milk chocolate, with or without nuts. And white chocolate Toblerone.

WIP: Vintage Holiday quilt - waiting to be basted, quilted an bound
Vintage Holiday Quilt Top


Favorite craft book: I have too many and hardly make anything from them... But I really like the projects in Zakka Style. The Fat Quarterly Shape Workshop has a lot of great modern blocks and projects. And if you don't already subscribe to the Fat Quarterly e-zine, I highly recommend it.

Favorite cookie: Chocolate chip cookies (this is my favorite recipe), with cold, cold milk to drink.

Favorite quilting tool: Besides the usuals, I love using stick-on leather thimble dots when hand quilting/embroidering/hand sewing binding . So much more comfortable than your traditional thimble!

Binding by hand or machine: By hand if the back will be seen, by machine if not (table runners, for example).

Favorite wines: Riojas, Cabernet Sauvignons and Syrahs/Shiraz. Or a good, dry Riesling. Mmmm, mmmm, mmmm! (Don't worry, I don't have a drinking problem. In fact, with being either prego or nursing the last 16 months, wine has been a low priority in my life.)

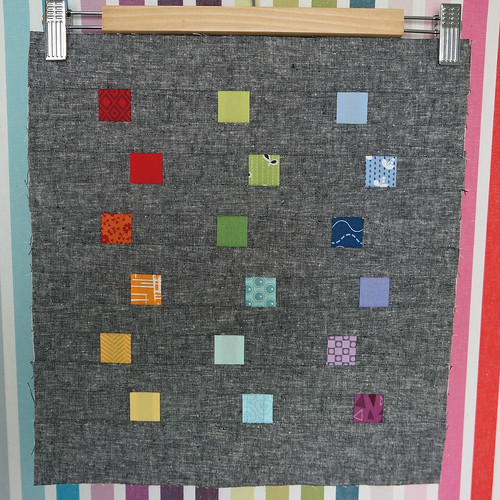
WIP: Front panel for tote for Mouthy Stitches 2 Swap
Mouthy_Stitches_2_front_WIP


Wish I'd know before starting blogging: How fun and social it would be and how much time it takes. A lot of time!

Favorite places to visit: Italy is beautiful (well, Norway is too, but that's just home to me). England is friendly. Copenhagen, Dublin and Edinburg are perfect sized big cities. Japan is on the wish list... And a safari in Africa would be cool...


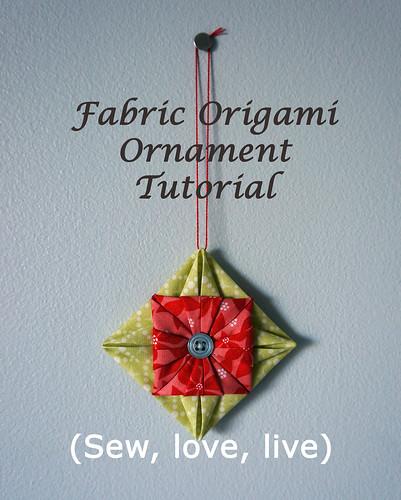
My tutorial for you can be found in the post below or by clicking here. I have channeled my inner Elizabeth Hartman (if you have her books, you will know what I mean) and made some color options at the end for your inspiration:)

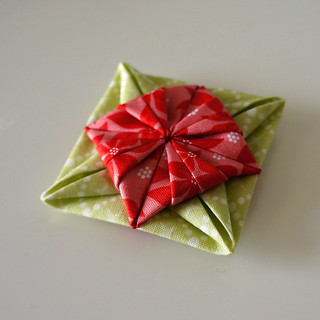
Ornament_cover


Check out the tutorial and let me know what you think! And then check out the other blogs on the blog hop this week:

Oct 9
         Amy from Sew Incredibly Crazy
         Foster from Foster Reviews It
Oct 11
        Chrissie from madebyChrissieD

Thank you so much for stopping by - leave me a comment and Let's Get Acquainted!

-Marit

Fabric Origami Ornament (Tutorial)


Origami fabric ornament tutorial

This is my favorite fabric ornament to make. It is very easy to sew and is sewn all by hand - perfect if you want to get out of your sewing space for a while:) And for a very inexpensive item, it sure looks fancy (i.e. it makes a great gift).


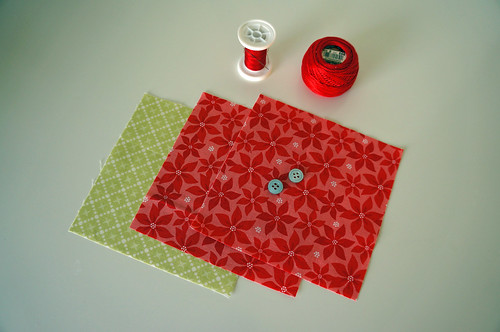
Materials needed:
Ornament_materials


  • 3 fabric* squares (one for center, two for front/back) - 5" squares are easy, 4" squares make dainty ornaments
  • 2 buttons/beads for embellishing center
  • String/yarn for hanging loop
  • Needle, thread, scissors
*Fabric should be "creasable", not fray too easily and not be too thick. Most quilting cottons work well. I haven't tried it, but spray starching the squares might be useful if using thinner fabric.

USEFUL TIPS:
  • Finger press all folds in all steps.
  • Fold and tack in place on side at a time for all steps (then you don't have to pin anything)
  • Cut you thread long enough to last for the whole piece

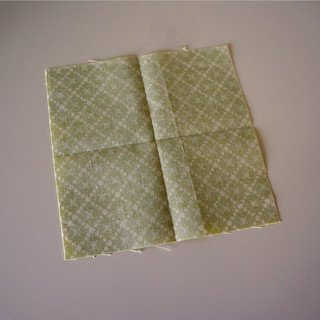
Step 1: Fold square in half and finger press crease, open up and repeat in other direction to make a creased cross in the center.
Ornament_step1

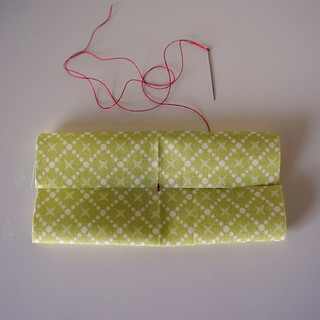
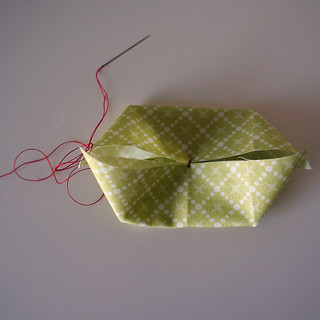
Step 2: Fold two opposing sides in towards center and tack in place at center.
Ornament_step2

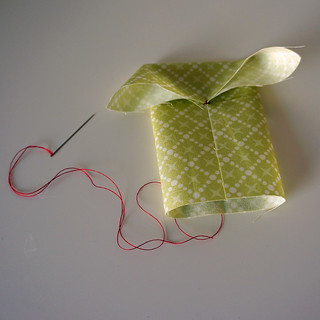
Step 3: Fold the other two long sides in towards center and tack in place.
Ornament_step3a

Ornament_step3b

Ornament_step3c

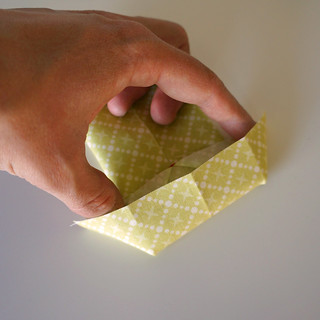
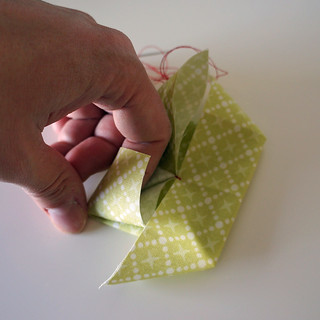
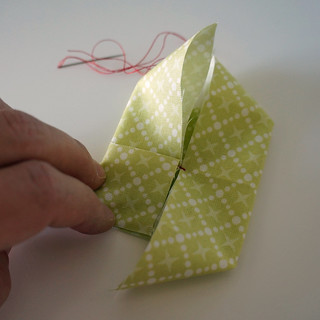
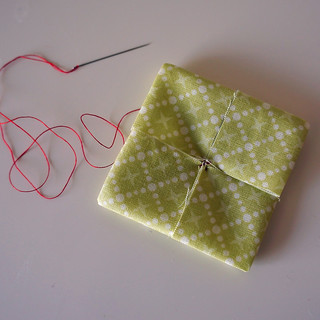
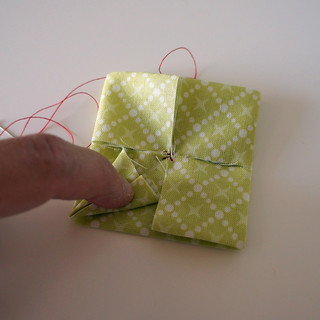
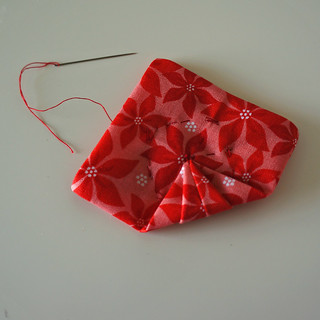
Step 4: Place a finger in one of the "ears" and flatten into a square. Tack in place. Repeat for the other three sides.
Ornament_step4a

Ornament_step4b

Ornament_step4c

Ornament_step4d


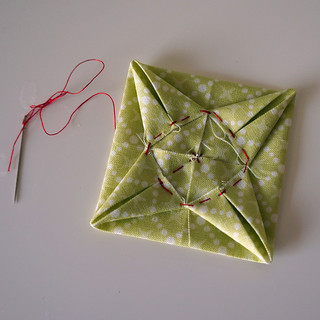
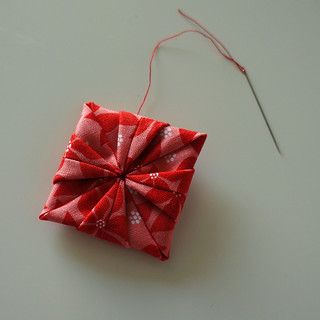
Step 5: Fold the sides of one of the little squares in to make a point and tack together. Sew all the way around, tacking in place on the sides of the "arrows" and where the folds meet.
Ornament_step5a

Ornament_step5b

Ornament_step5c


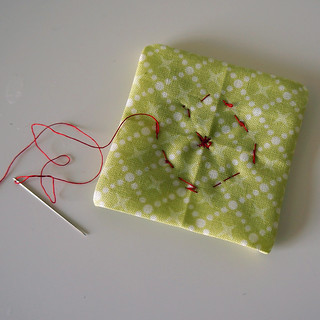
For center square: You are now finished. Just fasten the thread and cut it off. The back side should look like this - don't worry, all the stitches and raw edges will be covered:
Ornament_step5d

For front/back squares: Continue with step 6.

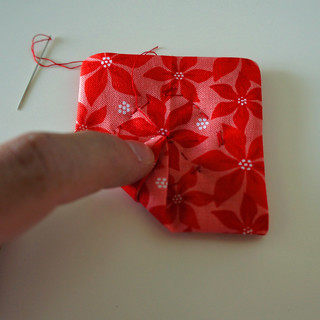
Step 6: Fold one corner towards the center of the back and tack in place. Repeat for the other three sides. Fasten the thread and cut it off.
Ornament_step6a

Ornament_step6b

Ornament_step6C


Okay - almost there!

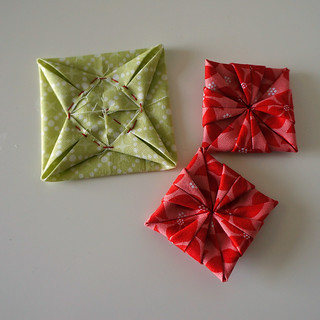
If you have made all your three squares you should have something that looks like this:
Ornament_completed_parts

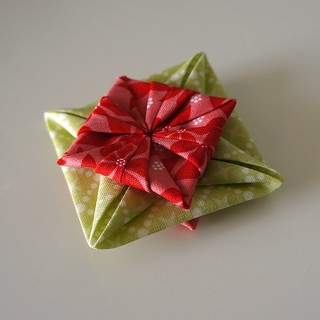
Step 7: Make a sandwich of your pieces (you should be able to use your crease lines from step 1 to see where the front/back points should meet) and tack together at all corners of the front/back.
Ornament_step7a


Ornament_step7b

Step 8: Sew your embellishments to the center front and back (sew through the sandwich) and sew a string through one of the points of the center (green) square to make a hanging loop. Congratulations, you are finished!

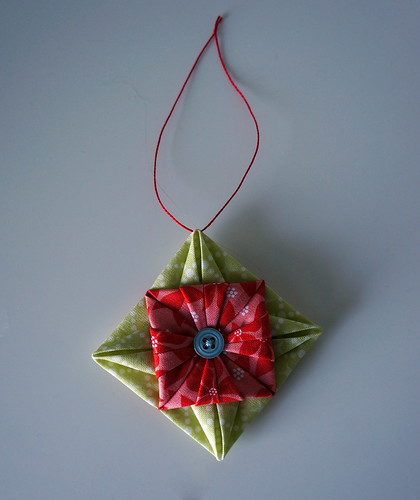
Front view:
Ornament_finished_front


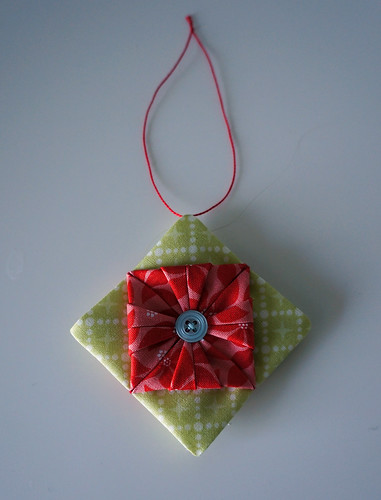
Back view:
Ornament_finished_back

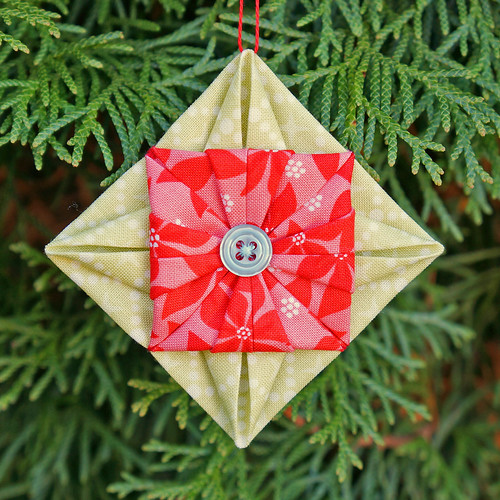
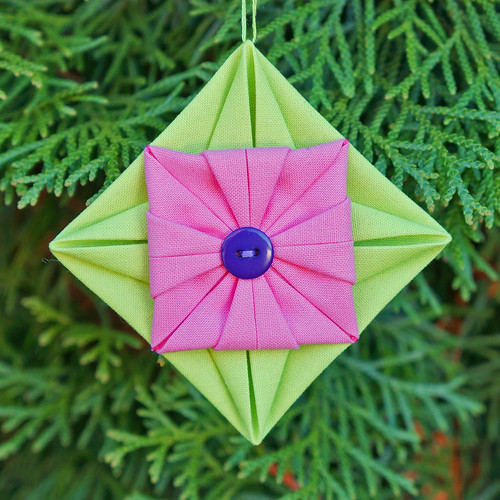
And it will look something like this hanging on your tree:
Ornament_modern


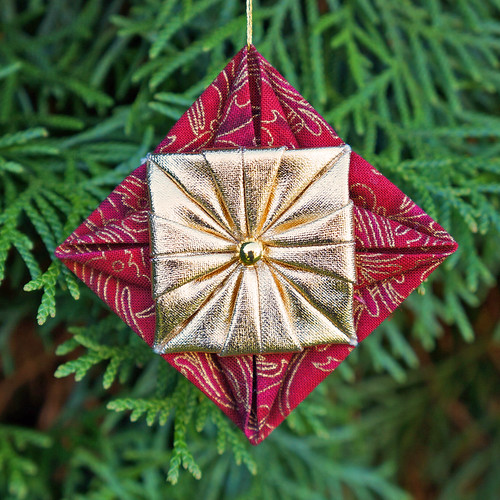
Alternative 1: Make it classic! (Gold fabric is a very thin laminate)
Ornament_classic


Alternative 2: Make it neon! How cool would a tree filled with these look?
Ornament_neon


So, this is my first tutorial ever written. I hope it makes sense! If you make one of these, send me a pic or link to a blogpost - I would love to see what color combinations you come up with.

-Marit

October 08, 2012

Windy City Days - finally a finish!

It feels like forever since I've had a proper finish to share, but today I am so happy to have a completed project to write about. Enough with all the WIPs already!
Det føles som en evighet siden at jeg hadde et fullført prosjekt å dele, men endelig er dagen her!

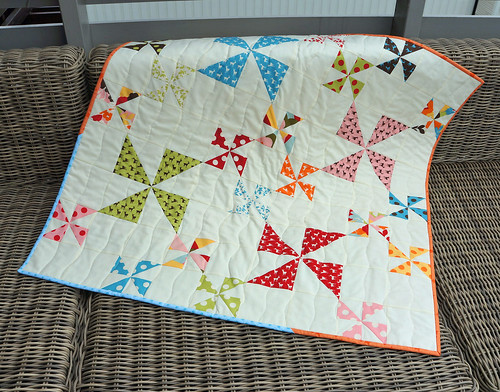
Lo and behold - the Windy City Days baby quilt:
La meg presentere - Windy City Days babyteppe:
Windy_Days_Quilt_On_Couch

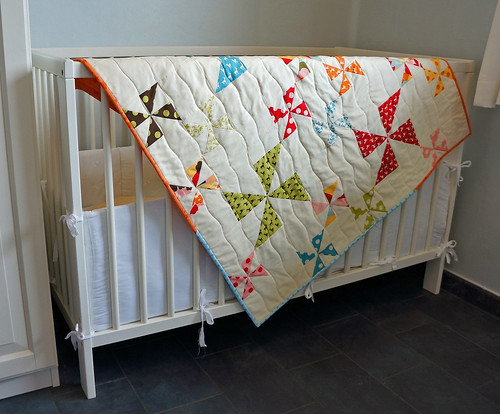
The quilt was made using the Windy Days Quilt tutorial from Moda Bake Shop. I've renamed my quilt Windy City Days, because it may go live in the windy city (Chicago). I just need to make sure the new mom approves of these colors for her baby girl.
Mønsteret fant jeg her. Mulig teppet skal sendes til Chicago (med kallenavn windy city) - må bare sjekke om den nybakte moren godkjenner fargene.

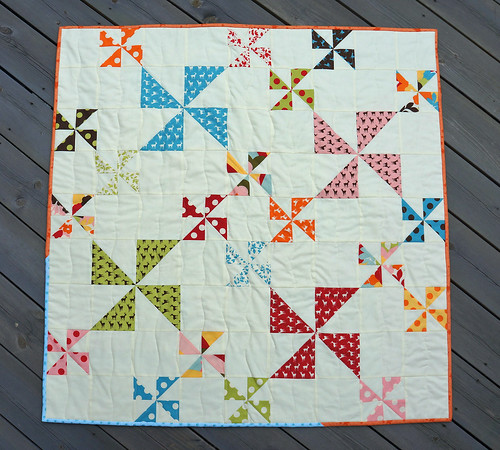
The fabrics used were a charm pack of Oh Deer! by MoMo for Moda and two charm packs of Moda Bella Solids in Snow (which is not the same as Kona Snow - it's darker). Yes, I was a lazy girl and went all pre-cuts on this one.
Teppet ble sydd av en charm pack (42 5"x5" ferdig oppkuttede biter) Oh Deer! og to charm packs med Moda Bella i farge "Snow". Ja, jeg var lat og kjøpte ferdig oppkuttede firkanter!
Windy_Days_Quilt_Front

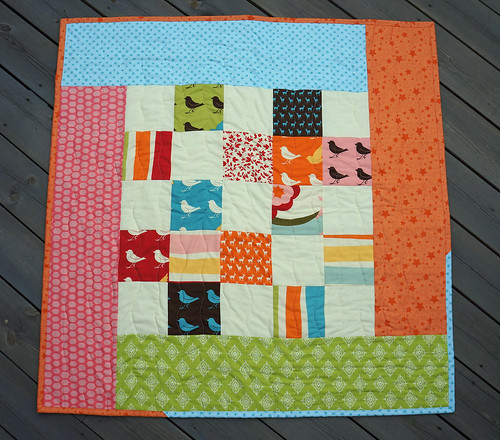
For the back I used up the rest of the charms - not a square to spare (yes, that is a Seinfeld quote). The colored "border" on the back are various prints from my stash. And the binding was the remaining orange fabric from the back with a little aqua added to make it all the way around.
På baksiden brukte jeg opp resten av 5"-lappene og lagde en bord av diverse stoff jeg hadde liggende. Lukkekanten ble lagd av de samme stoffene (måtte skjøte med litt turkis i det ene hjørnet).
Windy_Days_Quilt_Back

For quilting I did wavy lines every 2" - very quick and easy. I had intended to do some free motion quilting but chickened out/got lazy. Free motion quilting makes my shoulders so tense - I need to practice a bit more before I get comfortable with it.
Jeg quiltet teppe med bølgende linjer med ca. 5 cm mellomrom - veldig enkelt og raskt.
Windy_Days_Quilt_On_Bed

So that was one item crossed off my 100 Day Huste to-do list. Many more to go...

Oh - on Thursday the Let's Get Acquainted Blog Hop is stopping by here. Eeeek! I hope to have a fun tutorial for you by then. Here are the stops on the blog hop for this week:

Plum and June
Oct 9
Amy from Sew Incredibly Crazy         
Foster from Foster Reviews It
Oct 11        
Chrissie from madebyChrissieD        
Marit from Sew, love, live


Linking up today with:
Plum and June

Sew Happy Geek