

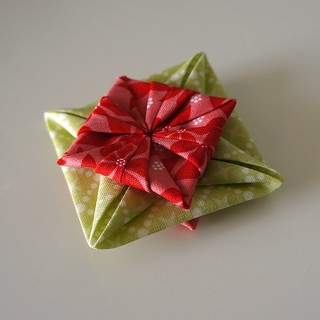
This is my favorite fabric ornament to make. It is very easy to sew and is sewn all by hand - perfect if you want to get out of your sewing space for a while:) And for a very inexpensive item, it sure looks fancy (i.e. it makes a great gift).
Materials needed:
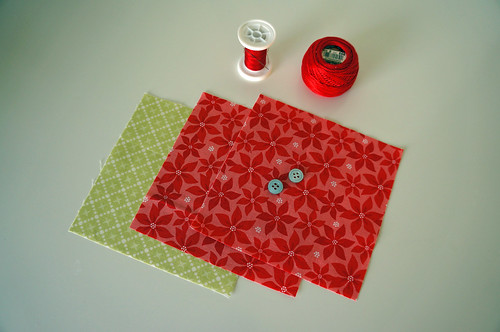
- 3 fabric* squares (one for center, two for front/back) - 5" squares are easy, 4" squares make dainty ornaments
- 2 buttons/beads for embellishing center
- String/yarn for hanging loop
- Needle, thread, scissors
*Fabric should be "creasable", not fray too easily and not be too thick. Most quilting cottons work well. I haven't tried it, but spray starching the squares might be useful if using thinner fabric.
USEFUL TIPS:
USEFUL TIPS:
- Finger press all folds in all steps.
- Fold and tack in place on side at a time for all steps (then you don't have to pin anything)
- Cut you thread long enough to last for the whole piece
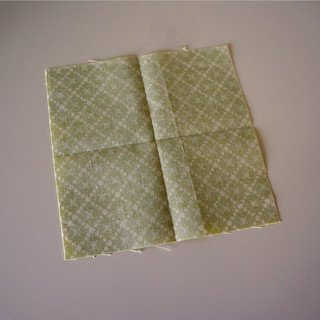
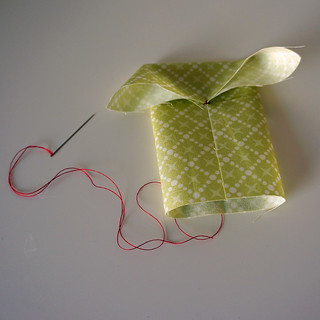
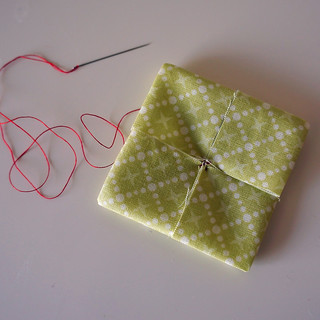
Step 2: Fold two opposing sides in towards center and tack in place at center.
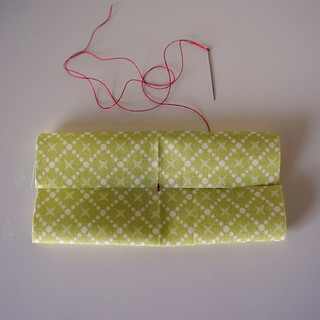
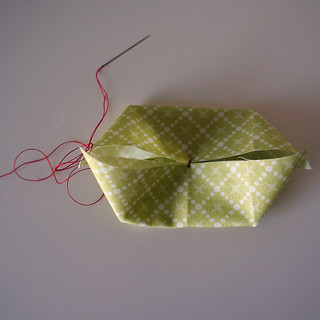
Step 3: Fold the other two long sides in towards center and tack in place.
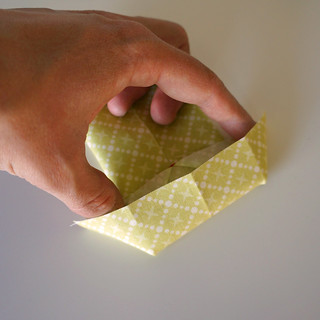
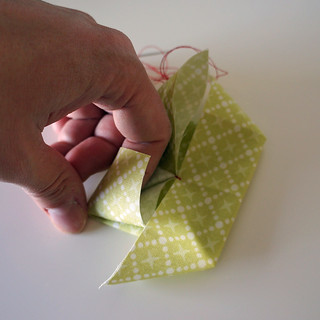
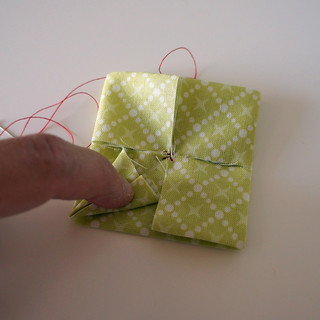
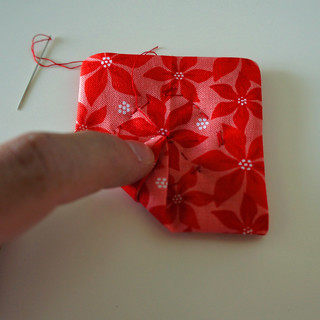
Step 4: Place a finger in one of the "ears" and flatten into a square. Tack in place. Repeat for the other three sides.
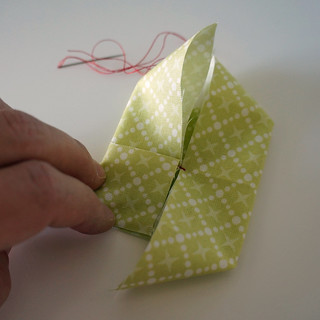

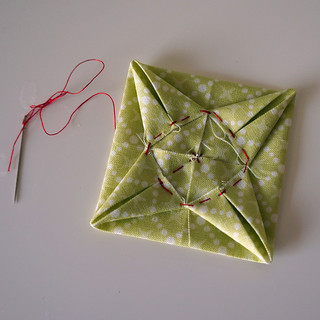
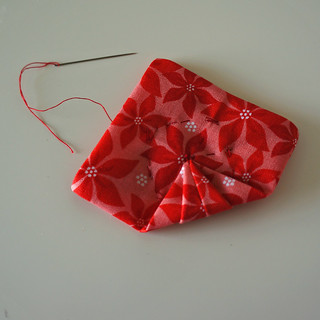
Step 5: Fold the sides of one of the little squares in to make a point and tack together. Sew all the way around, tacking in place on the sides of the "arrows" and where the folds meet.

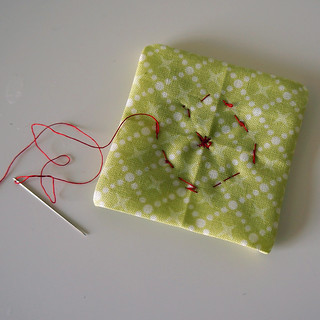
For center square: You are now finished. Just fasten the thread and cut it off. The back side should look like this - don't worry, all the stitches and raw edges will be covered:
For front/back squares: Continue with step 6.
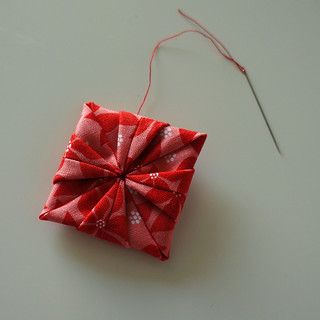
Step 6: Fold one corner towards the center of the back and tack in place. Repeat for the other three sides. Fasten the thread and cut it off.
Okay - almost there!
If you have made all your three squares you should have something that looks like this:
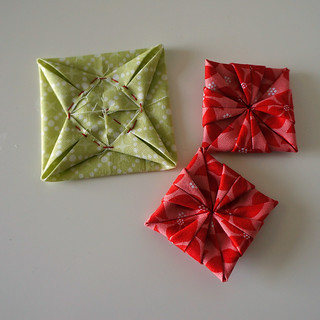
Step 7: Make a sandwich of your pieces (you should be able to use your crease lines from step 1 to see where the front/back points should meet) and tack together at all corners of the front/back.

Step 8: Sew your embellishments to the center front and back (sew through the sandwich) and sew a string through one of the points of the center (green) square to make a hanging loop. Congratulations, you are finished!
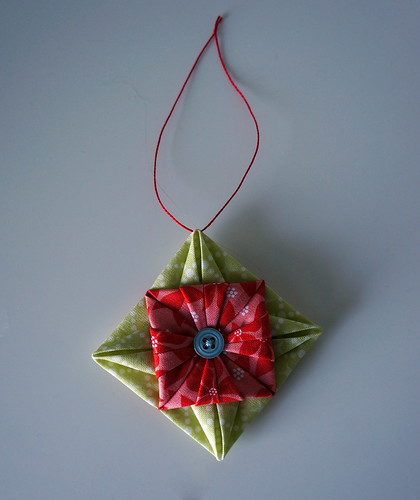
Front view:
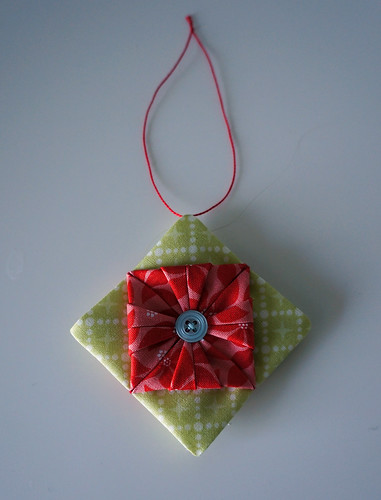
Back view:
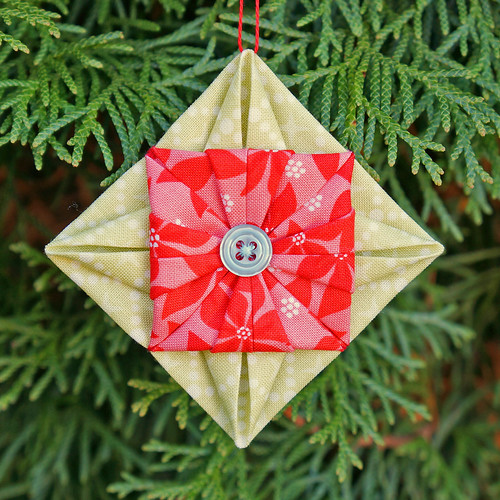
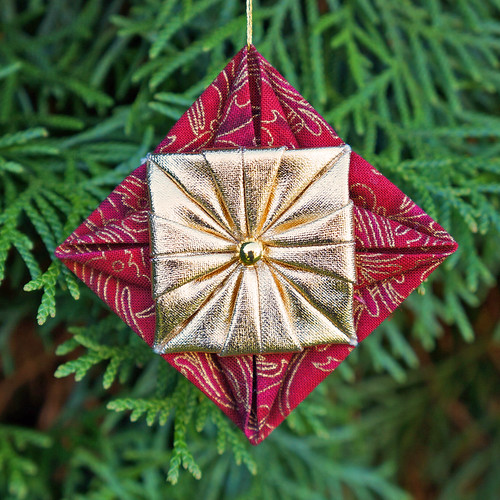
And it will look something like this hanging on your tree:
Alternative 1: Make it classic! (Gold fabric is a very thin laminate)
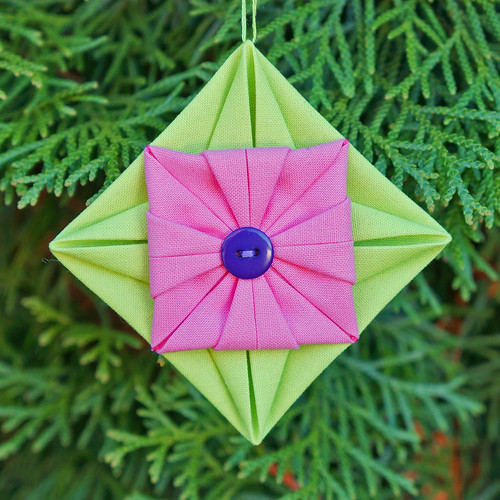
Alternative 2: Make it neon! How cool would a tree filled with these look?
So, this is my first tutorial ever written. I hope it makes sense! If you make one of these, send me a pic or link to a blogpost - I would love to see what color combinations you come up with.
-Marit
Utrolig fint! Kunne godt tenke meg å lage noen sånne, men de fleste bildene i tutorialen er utilgjengelige... Jeg er sikker på at tutorialen er kjempeflott om du får opp bildene!
ReplyDeleteLykke til.
Great tutorial - you make it look so easy.. I've added this to my 'must make' list - thanks for sharing!
ReplyDeleteThis is a great tutorial and it looks so easy! Thank you for sharing.
ReplyDeleteThat was great it looks like a fun project!
ReplyDeleteGreat tutorial. I'm going to try making some of these for gifts.
ReplyDeleteWow!
ReplyDeleteIt is amazing and I am going to definitely try one of these asap. I lost you a bit in the green folds but then I think I might need to be *doing* it whilst reading to get it.
Thanks for a fab tute
This looks great - I will definitely be having a go and will let you know how it works out!
ReplyDeleteI love it! Now to see if I can make one.
ReplyDeleteThis is great! Thank you so much for sharing
ReplyDeleteMarist, how did you know I had been surfing the web earlier this week for fabulous fabric ornaments? Now I don't have to continue! These are wonderful!! I can't wait to try them - perhaps at jury duty next week.
ReplyDeleteDarn auto correct wants to put an "s" in your name. Sorry, Marit!
DeleteWow, beautiful ornaments and really easy to make! Thanks for the great tutorial!
ReplyDeleteFantastic tutorial- I want to go make these NOW!
ReplyDeleteWonderful!! These are adorable! I'll have to make some :)
ReplyDeleteWhat fun! I love these! The first part looks a bit like folding fabric for a cathedral window.
ReplyDeleteMuchas gracias por el tutorial, esta muy bien explicado.
ReplyDeleteBesos
Hello - just seeing this posted on Facebook! I will make these this year for my stitch group's Christmas gift exchange! Thank you!
ReplyDeleteSuper joli !!! Merci beaucoup !!
ReplyDeleteEncantador, amei!
ReplyDeleteWonderful - I'm going to make some for my quilt guild friends! We made another pattern a few years ago, so they will love this one!
ReplyDeleteGreat tutorial and pictures! I thought you might like to know... somebody in WA state (USA) has learned how to make these ornaments, made a whole bunch of them, and donated them to the La Conner Quilt Museum to sell in their gift shop as a fund raiser. When I bought one, I asked if the clerk knew where the pattern came from. The person who made them had given the Museum the link to your blog. So here I am, happy to be able to make my own ornaments like this next year. Small world, isn't it!
ReplyDeleteI loved your tutorial, it's so nicely written, thank you very much! I made some ornaments myself, it's a pretty neat technique! Thanks for sharing! I'm working on my blogpost and will be back sending you the link so you can check them out :)
ReplyDeleteOk, so here's the link if you want to check them out! :) http://katisquilting.blogspot.com/2015/10/some-hand-sewing.html
ReplyDeletelove these. They are so pretty.
ReplyDeleteYou did an excellent job with your pictures and directions for it being your first tutorial! Thank you for sharing your work with everyone! These look easy enough to make with children.
ReplyDeleteun idea davvero bella! complimenti per il tutorial e grazie per averlo condiviso con noi... Spero ti faccia piacere essere sulla pagina di Acchiappaidee (http://www.facebook.com/Acchiappaidee/) buon lavoro a presto
ReplyDeleteThis is great! Just what I was looking for the 12 year old's can do.
ReplyDeleteDo you have a PRINTER friendly version?
ReplyDeleteMay I ask where you got the pattern? I am intrigued to find out. Thank you
ReplyDeleteI have been making ornaments for friends and family. This will be one of the next ones I make. Thanks, Lowell
ReplyDelete